Appropriate Handling
Installation
Instructions on
Deck Cranes
The installation process
The most advantageous way to install a steel wire rope varies from crane to crane. In all cases a method should be chosen that (at a reasonable cost) constitutes the lowest possible risk of twist or other damages to the rope. When unwinding the rope from the supply reel, the supply reel must be mounted in a way that allows its rotation.
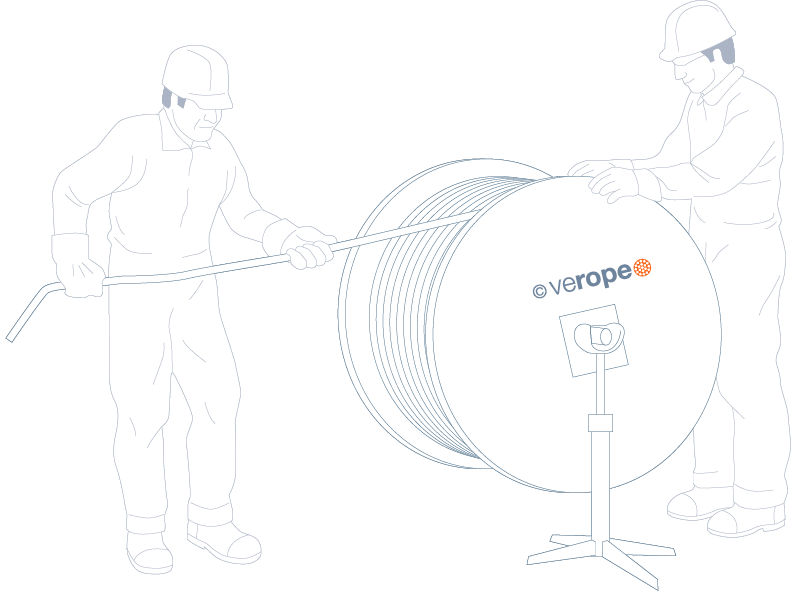
The removal of the new rope from a stationary pulley or non-rotating reel leads to rope twist and the rope can already be destroyed during installation.
For some cranes it may be advisable to lay down the old rope first and then install the new rope. For other cranes, especially larger cranes, it may be better to attach the new rope to the old rope and pull it in.
Another option is to use a thinner rope as the pull-in rope, with which the actual wire rope is later pulled into the system. This method is often used on new equipment. In any case, it should be carefully considered whether the wire rope should be pulled through the entire reeving system or whether it should first be wound from the reel onto the drum and then pulled into the system.
Typical example of a deck crane
Below is an example of a typical deck crane in which the rope is pulled from the rope reel over the sheaves into the reeving and wound onto the rope drum. It must be ensured that the rope surface remains clean and that no sand or dirt adheres to the rope lubricant. A dirty rope can damage its wires when running over the sheaves and significantly reduce the effectiveness of the lubricant.
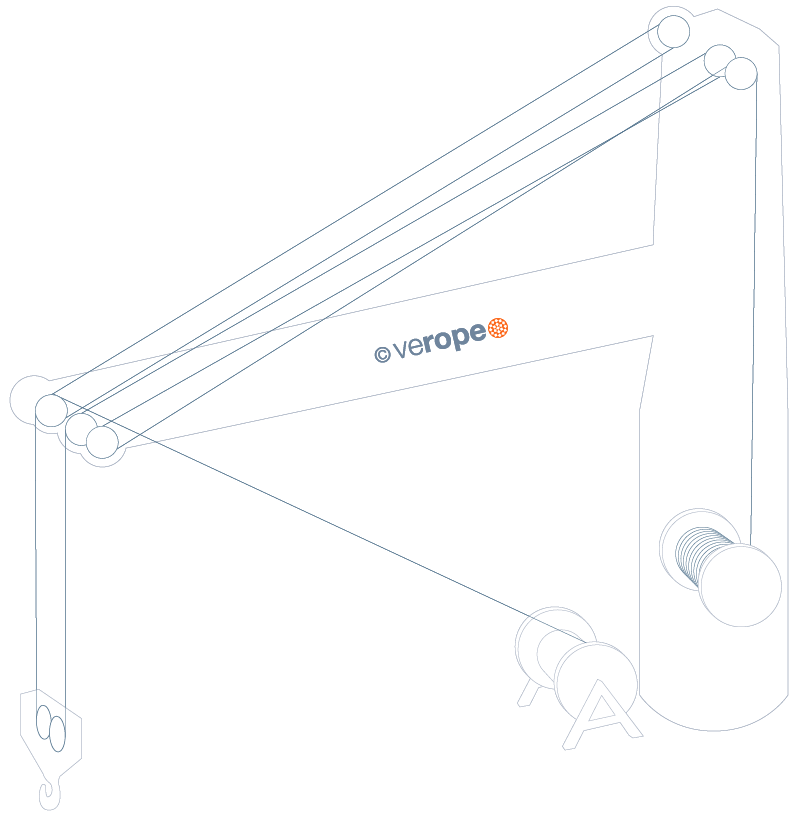
Installation of the new rope using the old rope or a thinner rope
If the new rope is pulled from the old rope or from a thinner rope, it must be ensured that the connection between the ropes is absolutely secure. It must also be ensured that the thinner rope cannot rotate/twist. For example, rotation-free ropes must be pulled in with the same rotation-free ropes or rotation-resistant 4-strand ropes. When installing non-rotation-resistant ropes, it must at least be ensured that new and old ropes have the same lay direction. In all cases it is helpful to install a small rope swivel between the rope ends in order to remove any possible twist.
If the new rope is pulled in with the help of the used rope, the two rope ends are often blocked. Such a connection can transfer the twist of the old rope which is in the system, into the new rope. This type of installation can cause extreme damage to the new rope even before it has been put into service for the first time. There are even more reasons why this procedure is very problematic: When welded mounting eyes are used, they can sometimes be overloaded and break due to the twist.
Fastening of the rope end connection at the fixed point
After the rope has been pulled through the reeving, the rope end connection must be brought to the fixed point. With the aid of a chain hoist, the rope end connection can be pulled to the fixed point and secured there with a pin. Before fixing, the rope end connection can be aligned exactly to the fixed point using a steel rod. The rod should be attached to the rope with a short chain. Under no circumstances should the rope be gripped with a wrench or pliers, otherwise the outer wires will be damaged.
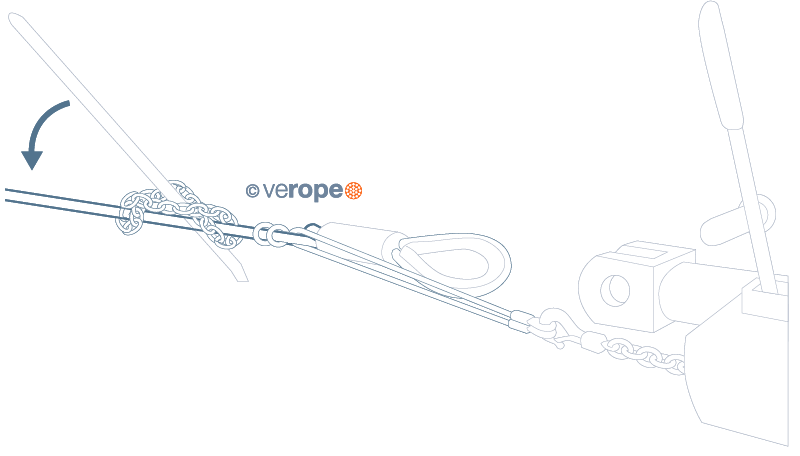
Incorporation of the new special wire rope
After the rope has been installed and before it fulfils its task, several runs of normal operation should be carried out under light load. The new rope should be “incorporated” so that the elements can settle and adapt to the actual operating conditions. It is regrettable that in practice the exact opposite of this recommendation is often made.
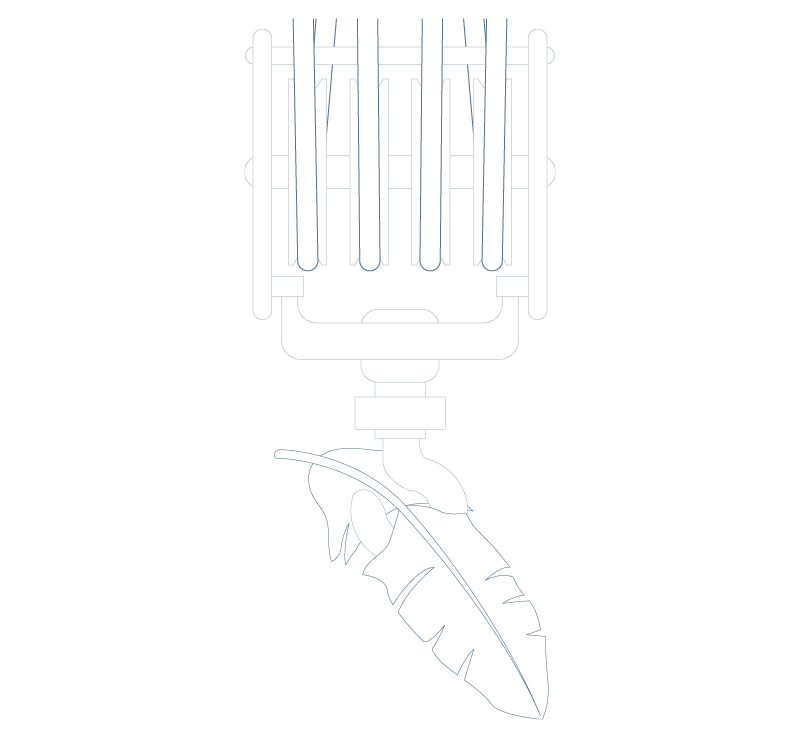
Untwisting of installed ropes
If the bottom block is twisted due to overloads (rope not being worked in), uncontrolled working conditions (diagonal pull) or a poor installation conditions (worn rope sheaves), the rope twist can be removed at the fixed point. However, the following procedure is only necessary if the rope strands touch each other. Rotation of the hook block by up to 90Åã can be regarded as normal. To do this, secure the rope at the end connection again with a chain hoist and loosen the fixed point.
When loosening the end connection, pay close attention to the direction in which it is twisted and how often. If necessary, the end connection can be further rotated several times in the rotating direction using the steel rod. Now the rope has to be fixed again at the fixed point and several cycles have to be carried out over the entire lifting height. As a rule, the twisting of the hook block has been significantly reduced however the process may have to be repeated again.

With the following hints we would like to draw your attention to some essential points for correct selection, operation and maintenance of wire ropes. In addition to technical literature on wire ropes, national and international standards, the verope® team will be happy to assist you with all questions concerning wire ropes. Please contact us!
The following points refer to the information that complies with the indications in this article. Here you will find an overview of all important information.

No. 12:
Hitting rope falls in the free rope length is always a sign of unbalanced torque in the rope. The friction, generated between the rope, leads to damages on the rope. One method of untwisting the rope length is described on page 26. Occurred damages must be rated with the help of this brochure or according to official standards.
If you have any questions, ambiguities or problems, please contact verope® Technical Customer Service: TCS@verope.com
Protect yourself and others!
Rope failure can cause serious material damage, injury or death!